
This blog post has been divided into two parts: The Ascent to Bhimashankar via Shidi Ghat (Ladder route) and The Descent to Khandas via Ganesh Ghat. Link to the second part can be found at the bottom of this page.
# 42
When: Monsoon ‘17
Where: Bhimashankar trek via Shidi Ghat & Ganesh Ghat
Range: Bhimashankar
Nearest railway stations:
1. Neral ~29 kms
2. Karjat ~ 30 kms
Base Village: Khandas
Best time to visit: Monsoon!
USP: Thrill of the Shidi Ghat & also Bhimashankar is one of the 12 Jyotirlings of India.
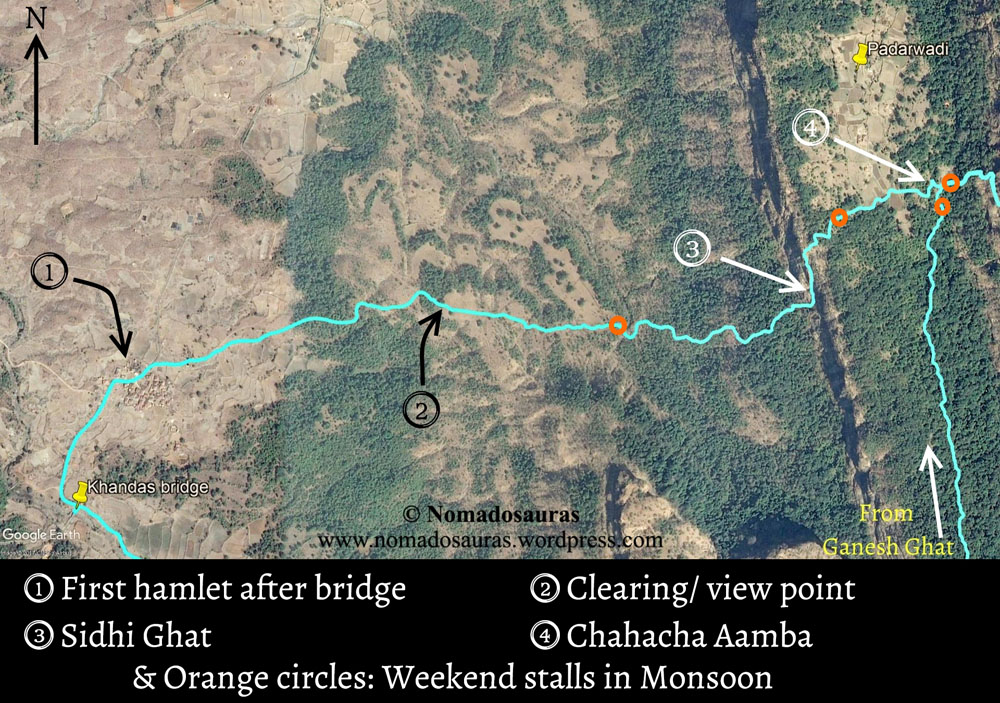
Food and Water: Refer section maps for approx. location of weekend stalls during monsoon. There are plenty of stores & restaurants near Bhimashankar temple as well.
Accomodation: A few hotels/Lodge near Bhimashankar temple OR Pawarbaba’s Ashram near Chahacha Aamba (merging point of Ganesh Ghat & Shidi Ghat routes). You can also arrange night accommodation in Khandas by calling Suresh Bhau (number given in transport section).
Total Time: 11.5 hours (of which active time: 7 hours).
Approx. expenses: Less than 400 Rs/Head.
Difficulty: Tough for Beginners & Moderate for Experienced trekkers
Endurance: 4 (If attempting both routes in a day, else Endurance grade: 3)
Risk Factor: High for Shidi Ghat (Slippery rock patches and rockfall pose a risk during Monsoons). Medium for Ganesh Ghat.
What do these gradings indicate? Find out here!
Map:
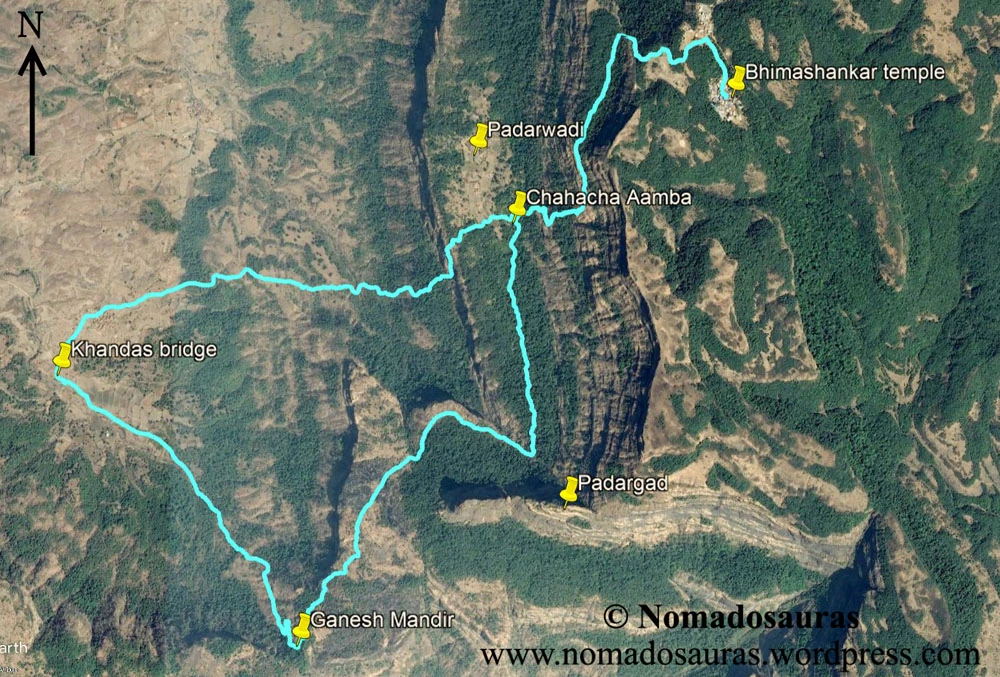
Complete Trail length: (From Khandas Village)
1.Shidi Ghat: 7.5 km
2. Ganesh Ghat: 10.2 km
Actual distance covered: 15.5 kms (We started from Khandas bridge, which is 1.7 kms from Khandas village)
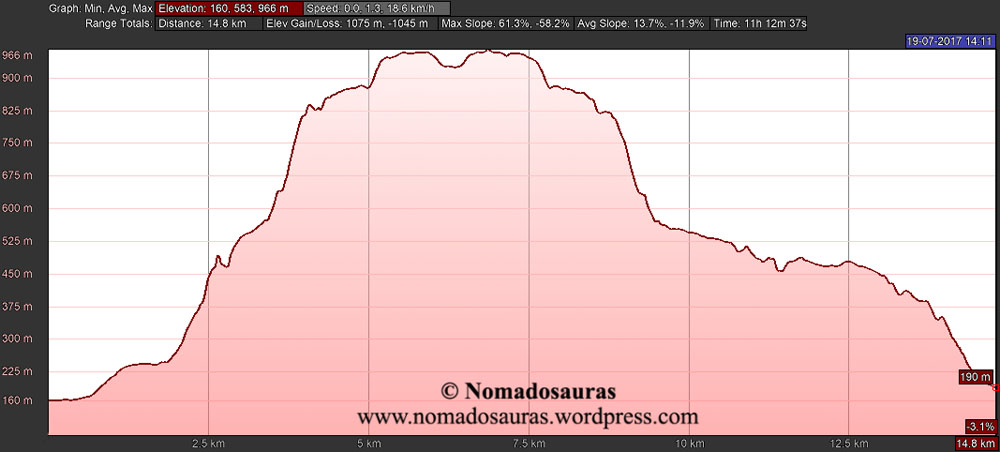
Max Elevation of trek: 966m/3175 ft as per Google Earth.
Total Elevation Gain & Loss: 3526 ft / 3428 ft respectively.
Route: Neral- Kashele-Khandas-Shidi Ghat-Mungi Ghat-Bhimashankar Temple-Mungi Ghat-Ganesh Ghat-Khandas- Neral
Directions: Alight at Neral railway station by Karjat/Khopoli bound trains and board a sharing Tum-Tum/Van to Kashele (20 Rs/seat) from the West side. From Kashele, you can either wait for the bus to Khandas (caution: erratic times) or hire a Car(Fare may vary depending on time of the year)/board a sharing Tum-Tum (30-40 Rs/seat, again depending on time of the year). Proceed towards Bhimashankar by the tar road to Khandas bridge and then turn right for Ganesh Ghat or left for Shidi Ghat.
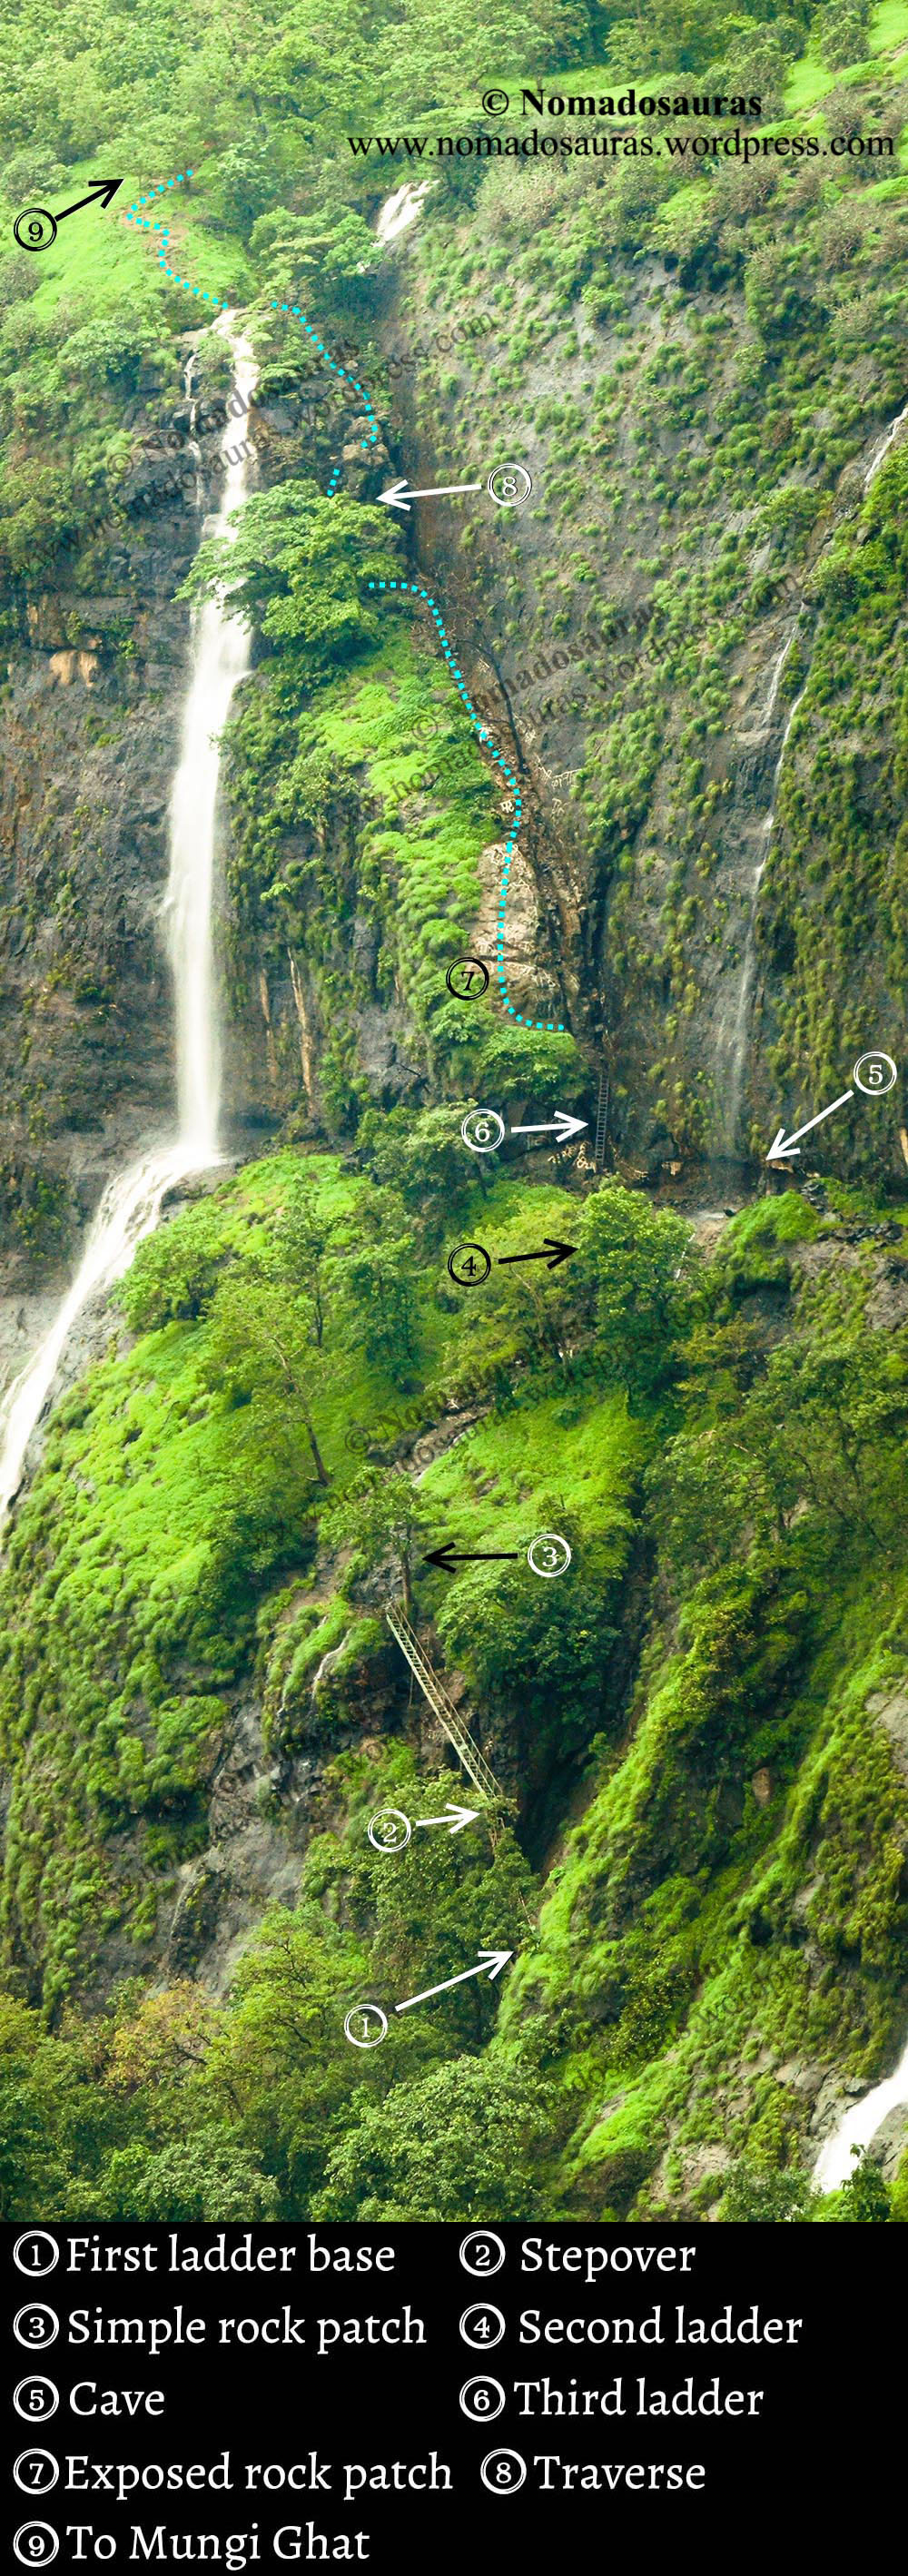
- Shidi Ghat Ascent: You ‘ll cross a small hamlet, about 400m from the bridge. Take the first right after hamlet to walk onto a kuchcha road which gradually turns into a trail passing through sparse forest. The trail opens up to a small plateau with a clear view of the Shidi Ghat. Cross a stream and negotiate the steep climb to reach first ladder. Another ladder brings you to a cave and the third ladder takes you to a tricky rock patch with excellent finger holds. Cross a protruding rock to reach the final rock patch, which leads to the top of the waterfall. Proceed along a trail going north which later turns east, cutting through paddy fields to ultimately merge with the Ganesh Ghat trail at the Chahacha Aamba.
- Mungi Ghat (Common for both): Head east from the Chahacha Aamba by the broad trail that zigzags over steep terrain to enter the dense forest of Bhimashankar. A 45 minute traverse brings you to the enclosure of Hanuman pond. Turn left and walk along the fence to cross a parking lot and enter Bhimashankar temple premises across the tar road. The road besides Ram mandir is the starting point of Gupt Bhimashankar trail. Follow the same route while descending till you reach Chahacha Aamba.
- Ganesh Ghat Descent: Turn south (left) from Chahacha Aamba to start walking along the Ganesh Ghat route. The dense forest will lead to a waterfall in half an hour’s time from the merging point. Proceed west from the waterfall to reach the Ganesh temple. Continue descending by the rocky trail to reach the tar road and hitch a ride back to Neral via Khandas.
GPS trail: Click here to view GPS trail on Wikiloc -> Bhimashankar via Shidi Ghat & Ganesh Ghat.
Other transport options: Buses ply to Kashele/Khandas from Karjat but are unreliable. Best option is to travel by sharing Tum-Tum/Van between Neral-Kashele-Khandas.
For booking a Car from Karjat/Neral to Khandas: For groups of 8-10 trekkers, hiring a car is a good option, especially if you plan to reach Khandas night before the trek. Mr. Suresh Ainkar (Phone # 7350492119) ferried us from Kashele to Khandas and back all the way to Neral. He drives a Mahindra Bolero and provides round the clock pick-n-drop facility from Neral/Karjat on prior notice.
Alternative Routes:
- Gogul Ghat: This route is unknown to many trekkers and not mentioned in the trekking books probably because the route is not well defined. From the small bridge on the tar road trek uphill till you meet route no.1 at the base of Padar Killa. This route surpasses the Ganpati temple. The route passes over big rocks most of the time and so it is difficult to locate the track. Hence it is better to hire a villager to avoid inconvenience.
(Source -> Ruzbeh Billimoria’s blog which has been taken down as of 2018) - Bhorgiri-Bhimashankar: 1 Day (From Pune)
- Jamrung-Bhimashankar loop via Vajranti Ghat: 1 Day (Source)
- Lonavla-Bhimashankar (LoBhi): 2-3 Day
Lonavla-Valvand-Kondheshwar temple-Dhangarwadi-Talpewadi-Kamaljai plateau-Bhimashankar - Naneghat-Bhimashankar (NaBhi): 3-4 Day
Naneghat-Jeevdhan-Amboli-Dhakoba-Durg-Durgawadi-Ahupe-Kondval-Bhimashankar.
Our Itinerary:
0448 hrs- Train to Karjat
0700 hrs- Alighted at Neral
0830 hrs- Reached Khandas Bridge after Breakfast
1000 hrs- Reached first ladder
1145 hrs- Chahacha Aamba
1430 hrs- Bhimashankar Temple
1540 hrs- Started descent
1710 hrs- Back at Chahacha Aamba
1815 hrs- Reached view point
1915 hrs- Reached Ganesh Mandir after losing the route once
1945 hrs- Boarded Car at the start of Tar road
2020 hrs- Reached Neral
2100 hrs- Boarded 2056 hrs fast train for CSTM from Neral
NOTE:
- All the pictures used in this post have been clicked by me or my friends, unless stated otherwise.
- The information provided in this post is for informational purposes only. Any reliance you place on such information is therefore, strictly at your own risk. For full Disclaimer and Content (including Images) Policy, click here -> Terms of Use.
Prologue:
The month of June passed without a single prolonged wet spell but we didn’t let it dampen our spirits as we patiently waited for our annual saviour- July!
For the past three years, some of our most cherished treks have happened in the month of July and this year was going to be no different as we set our sights on another must-do trek in the Sahyadris: Bhimashankar!
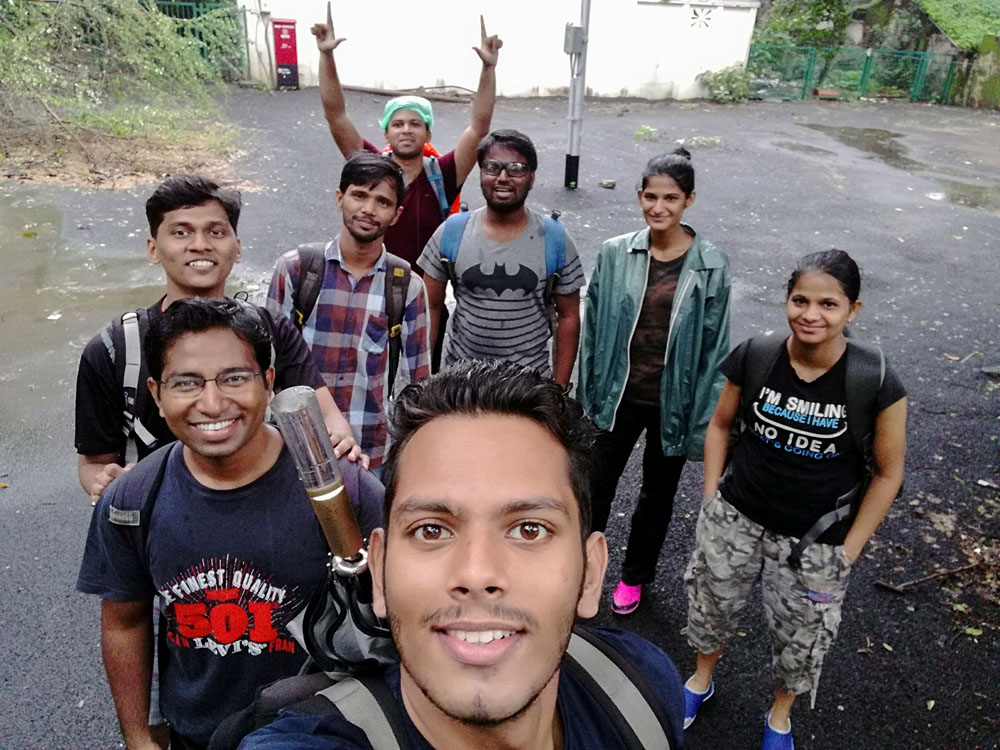
The Gang: Abhishek, Darshana, Manish, Mansi, Omkar, Shardul, Tejas & Me
Another Season begins!
We had been racking our brains trying to find an interesting one-day trek near Mumbai but none of the names put forth excited us. Even my usual trick of going through the bookmarked blogs didn’t work its charm this time round.
And then I understood. It was finally time to bring out the ultimate trekking resource of mine- THE DRAGON SCROLL OF TREKS!
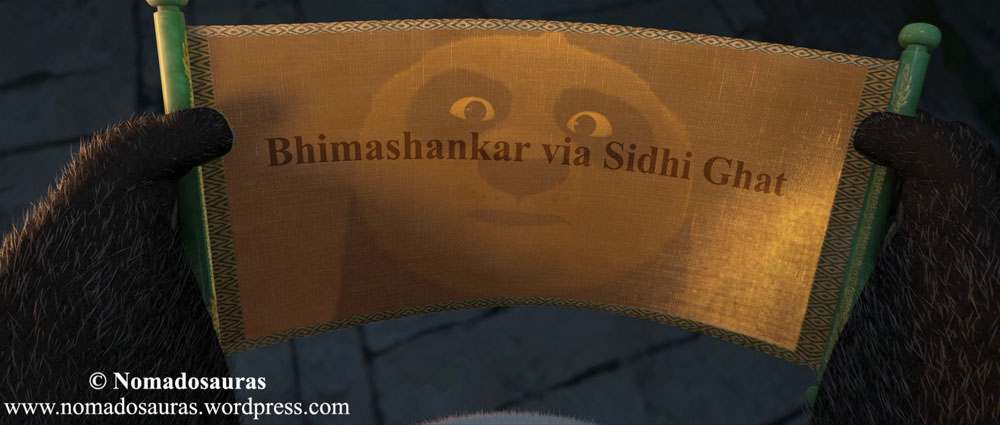
Yes! BHIMASHANKAR VIA SHIDI & GANESH GHAT!
The trek to Bhimashankar had long been at the back of my mind but the cautionary line attached with every description of Shidi Ghat always made me wonder if I was skilled enough to take it on, that was UNTIL this year. With a bank of several ‘difficult’ trek experiences to draw upon, I finally felt ready to do it. But now the question wasn’t “If we could do it” but “If it could be done in a day” because a two-day break wasn’t possible for most of us.
None of us had been to Bhimashankar before, except Abhishek. He has been going to the Bhimashankar temple by Ganesh Ghat route every year with his friends as a form of annual pilgrimage in the fasting month of Shravan. But last monsoon, he trekked up by the Shidi Ghat for the first time (again, as a two day trek). I read a number of blogs but most of them followed a two-day schedule, save for a trek to Bhimashankar by Sujit Mallick which he recorded on video. I asked him what sort of schedule they followed and his super-quick reply about them doing it in a day was all the information we needed to set the ball rolling!
Note: If you attempt it as a two-day trek, you can visit Nagphani peak, Hanuman temple, Gupt Bhimashankar trail and Bombay point as well!
Since the routes in Sahyadri are dynamic by nature, we wanted to know the condition of the trail this year and hence, started getting in touch with people who had done it recently. I ‘ll be lying if I say I wasn’t disappointed cos people don’t usually bother keeping track of the little details that I tend to fret over. But one thing they were very particular about was this- Do not take the Shidi Ghat for granted.
So we doubled down and decided to cover all bases. Maps were made, exit points were identified, alternate routes from these points were noted down, detailed itinerary was shared with our backup (a person with complete information of the trek) and last but not the least, contingency plans were kept ready to take care of every eventuality.
Sounds like War? We certainly went prepared for one! 😀
As unreliable as Indian Meteorological Department (IMD) is, I still kept a tab on the weather forecast. And a week out from the trek, Abhishek sends a grab of the TV screen showing this-
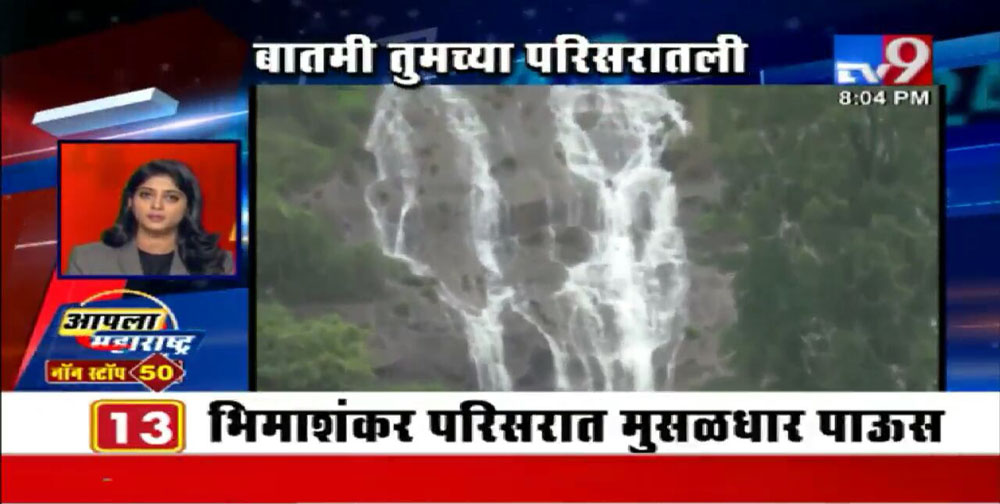
Great! As if our families weren’t panicking enough already! 😛
Mumbai received 100+ mm rainfall on three consecutive days before the trek. Thankfully, the heavy downpour had reduced to a drizzle by the penultimate evening and then came the sign I was waiting for- IMD released a circular warning about heavy to very heavy rainfall in the next 48 hours! Bas! I knew that very moment ki kal barish hogi hi nahi!! 😃 😝
Initially, the Gang was supposed to be 11 strong but Krunal, Anupama & Sangeeta couldn’t make it due to some reason but all three of them (And Anupama in particular cos she was our backup for the trek!) were a great help, keeping our spirits up when the rains were threatening to scupper our trek plans. If you guys are reading this post, a big Thank You to all three of you! 😊
The Morning Mania
(You can skip to “THE TREK” section without missing any useful info. Btw, this section is interesting too! Just saying :-P)
It was 3.30 in the morning when I literally killed the snooze button (& my cellphone’s screen as well! Well… almost 😝) in my enthusiasm for the trek.
Omkar was going to be the first one to board the train and a text from him at 4.15 confirmed the trains were running on schedule despite the wet spell. Soon others reached and even sent pictures of the deserted stations as if to drive home the point that I make them leave their cosy beds at ungodly hours! 😝

Now it so happens that everytime I go for a trek, I reach the station well before the train’s expected time and then I have endure the agony of watching empty trains pass me by 😝
So I had decided this time that I won’t reach the platform any earlier than 10 minutes to the train’s Scheduled Time of Arrival (STA). And this rather risky plan very nearly came back to bite me! With everything packed and done, I just sat there watching the wall clock’s minute hand move until it showed 20 minutes to the train’s STA.
STA-20 minutes: It never takes me more than 15 minutes to reach the station from my place so, with a buffer of 5 minutes, I strode out like there was nothing surer in this world than me boarding that train.
STA- 15 minutes: About 200m from the Society’s gate, I found a queue of Autorickshaws waiting at the stand. Boarded one without a worry in the world. Everything was under control.
UNTIL THEN.
STA-15 Minutes to STA: Over the next 15 minutes, the driver did everything possible to make sure I didn’t reach the station in time! 😝
Arrange his wares for the long day ahead before starting the ride? Check.
Drive slower than the morning jogger moving like a zombie on the adjacent footpath? Check.
Pickup a newspaper for his morning fix of news from a vendor on the way? Check.
With my pleas to hurry up being ignored, I called up Abhishek and told him that I would not be able to board the coach they were in as I was running a “little” late and might have to board the first coach I find, that is if I make it at all (the last part was kept to myself 😝).
STA+1 minute: I have never travelled for treks without a ticket and never in my dreams thought I ‘ll, but in that moment, my life’s priorities cleared up
Treks > Ethics of not travelling without a ticket.
With that crucial decision subconsciously made, I literally ran from the auto to the overbridge and let out a sigh of relief when I saw the indicator dispalying 1 more minute to the Expected Time of Arrival (ETA)! Never have I been so ecstatic about Central Railway’s lack of punctuality! 😃
And with another minute to spare, I darted to an ATVM machine, got myself a return ticket to Karjat and reached the platform just as the train’s twin headlights came into view round the corner! Phew! The ethical turmoil will have to wait another day! 😉
The Trek
Our train reached Neral at 0700 hrs, still 5 minutes behind schedule and we walked out the west end to the Tumtum stand, about 100 metres from the Railway station.
The only TumTum for Kashele was so full of people that a couple of them would have certainly fallen out at the first pothole. Abhishek and I went to the driver to enquire if there were other TumTums to Kashele but his eyes lit up as soon as he saw the two of us and even before we could speak, he began convincing us that there was space for exactly two more people in the TumTum! It was only when we told him there were 6 more with us that the people inside the vehicle let out their breaths and re-occupied the space they had created for us. 😝
He told us to wait and called up another guy who arranged a van for us (we confirmed that the van will charge the same as TumTum: 20 Rs/Seat for the 12km commute).
The Van showed up in 5 minutes and since it was meant for 10 seats, he was going to wait for 2 more passengers. Overjoyed at the prospect of a rare comfortable journey to the hinterlands, we decided to pay for the other two seats, which meant we left immediately instead of waiting for the next wave of passengers who would have arrived with the following train.
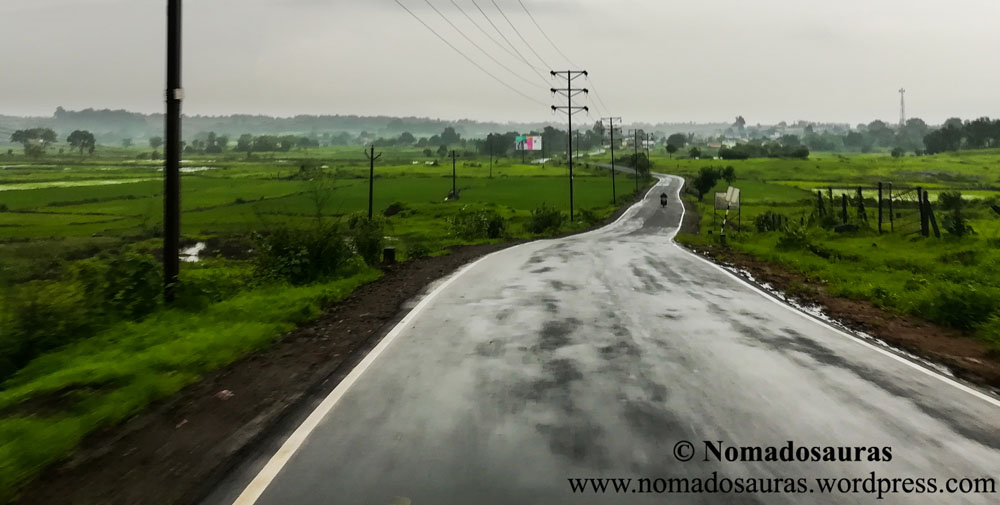
Once you cross the outskirts of Neral, the road is as good as any you ‘ll find (save for the highways) in Maharashtra. With the grey road cutting through lush green fields stretching to the horizon and the odd hut in middle of nowhere completing the postcardesque views, it remains one of the rare times I have wished the journey to a base village should have went on a little longer.
We reached Kashele at half past seven, paid the fare for 10 seats (200 Rs) and walked to the Kashele junction, where 5 roads meet. An elderly driver approached us and asked if we were going to Bhimashankar. We replied with a Yes and then walked straight into the only restaurant open at that hour to start the day with a round of Onion & Potato pakodas and a steaming cup of tea! Drizzle in the countryside with a plate of Pakodas and Chai! What more could one ask for!

A Mahindra Bolero turned up in a couple of minutes and we got down to discussing the fares. Suresh bhau (whose number I have shared in the general info) said a ride to Khandas village from Kashele village (14 kms) will set us back by 300 Rs whereas for 50 Rs more, he would drop us as far as the car can go on either routes.
NOTE: We went on a weekday when the cars aren’t in much demand. If you go on a weekend, be prepared to pay much higher fares.
Starting the trek with a steep climb right off a vehicle isn’t a wise thing to do as your body needs to warm up a bit, so we decided to take the car only as far as the Khandas bridge (about 2 km from the village), leaving us with a 1.5 km level walk before the uphill stretch starts.
The road from Kashele to Khandas isn’t bad but not as good as the one till Kashele. If you aren’t careful, the potholes could leave you with a bump on your head even before starting the trek! The 20-minute ride later, we got down at the Khandas bridge and in front of us stood the majestic range of Bhimashankar.
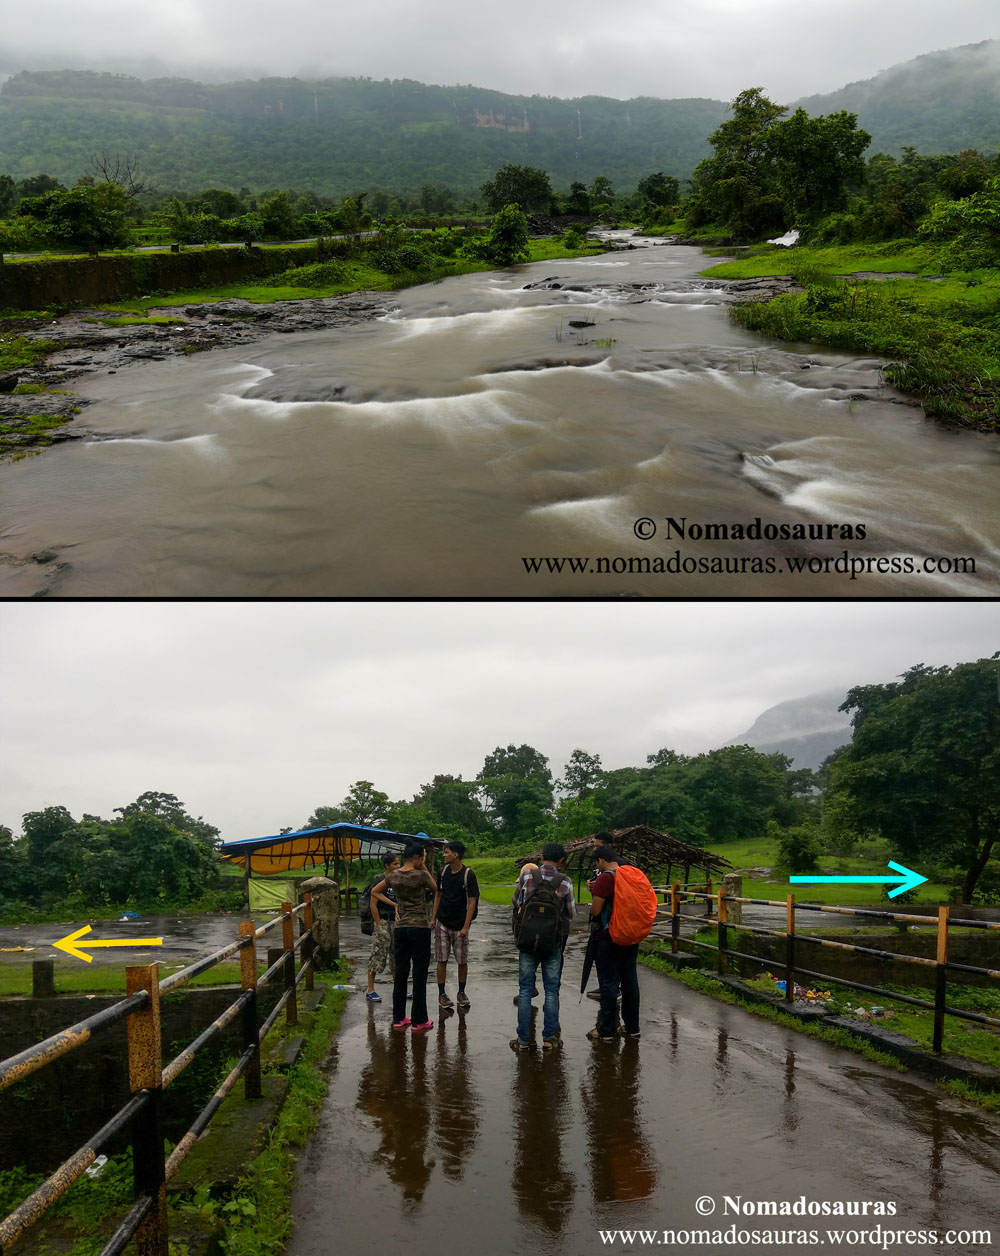
We paid 350 Rs to Suresh Bhau and told him we planned on returning the same day after doing both the routes. He asked us to be careful on Shidi ghat and gave us his number, in case we needed any help on any part of the route. As for the return journey, he quoted 1k for the ride to Neral from Ganesh Ghat but after some negotiation, he relented and agreed to take us back for a fare of 900 Rs (If you want to head to Karjat instead of Neral, the charges will remain 1000 Rs). With the return ride taken care of, we exchanged numbers and started off after clicking a few snaps near the bridge.

We turned left from there and thus started the first trek of the fourth Season Of Mountains!
The weather was as pleasant as we ever had come across- Light drizzle and a temp in the low 20’s! We came across the first settlement barely 10 minutes into the trek- A cluster of brightly coloured houses and a temple completed the quaint little hamlet.
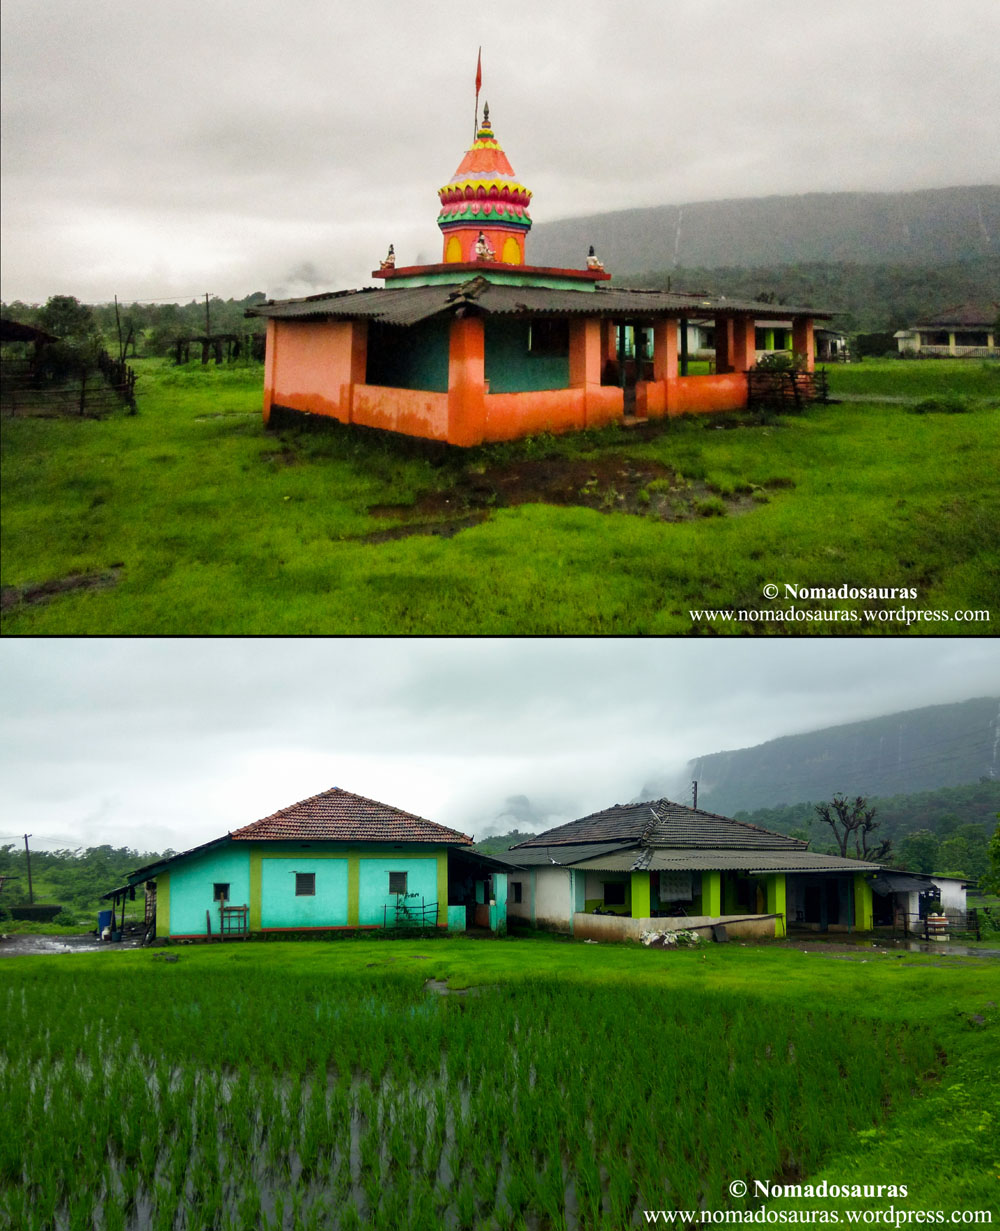
The first right after crossing the Hamlet took us onto a kuchcha road, flanked by fields on either side. Such is the sheer height of the Bhimashankar hill that only the lower plateau is visible from the road and yet it is awe inspiring! We soon passed a well and a hundred metres beyond it, the uphill climb started!
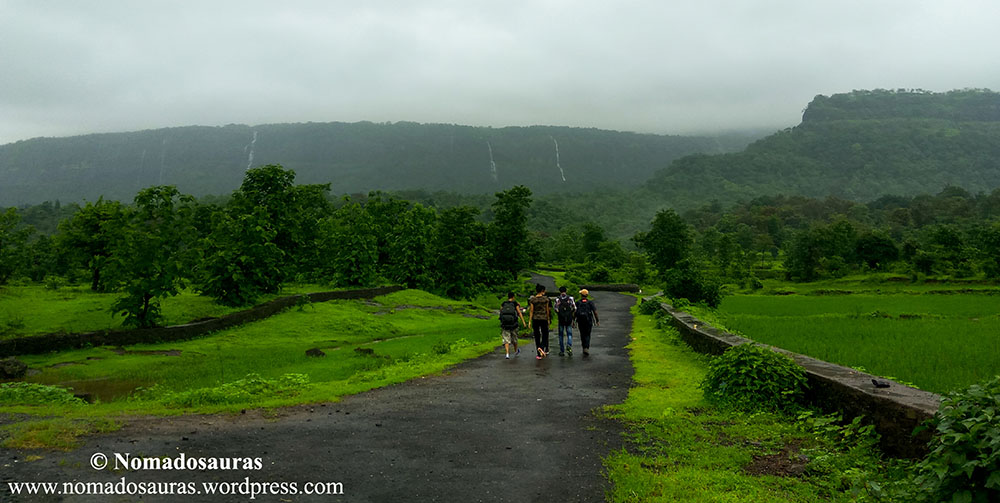
There’s a single trail going from the well in the plateau’s direction, so there’s little chance of losing the way here. When in doubt, keep walking along the broadest trail and you ‘ll be fine. The trail passed through a sparse forest and a four-legged friend joined us for a little while! 😊
The trail led us to a huge clearing and not knowing if we would get such an open space ahead, we decided to get ready for the heavy downpour, which seemed imminent at that point of time. And thus came out the sleeves, caps, bandana and rain covers!

Attention Photobugs! The clearing provides the best head-on view of the Shidi Ghat, so keep your shutter machines ready when you reach it. Numerous falls dot the entire western face of the mountain and the Shidi Ghat stands bang in the middle of two waterfalls.

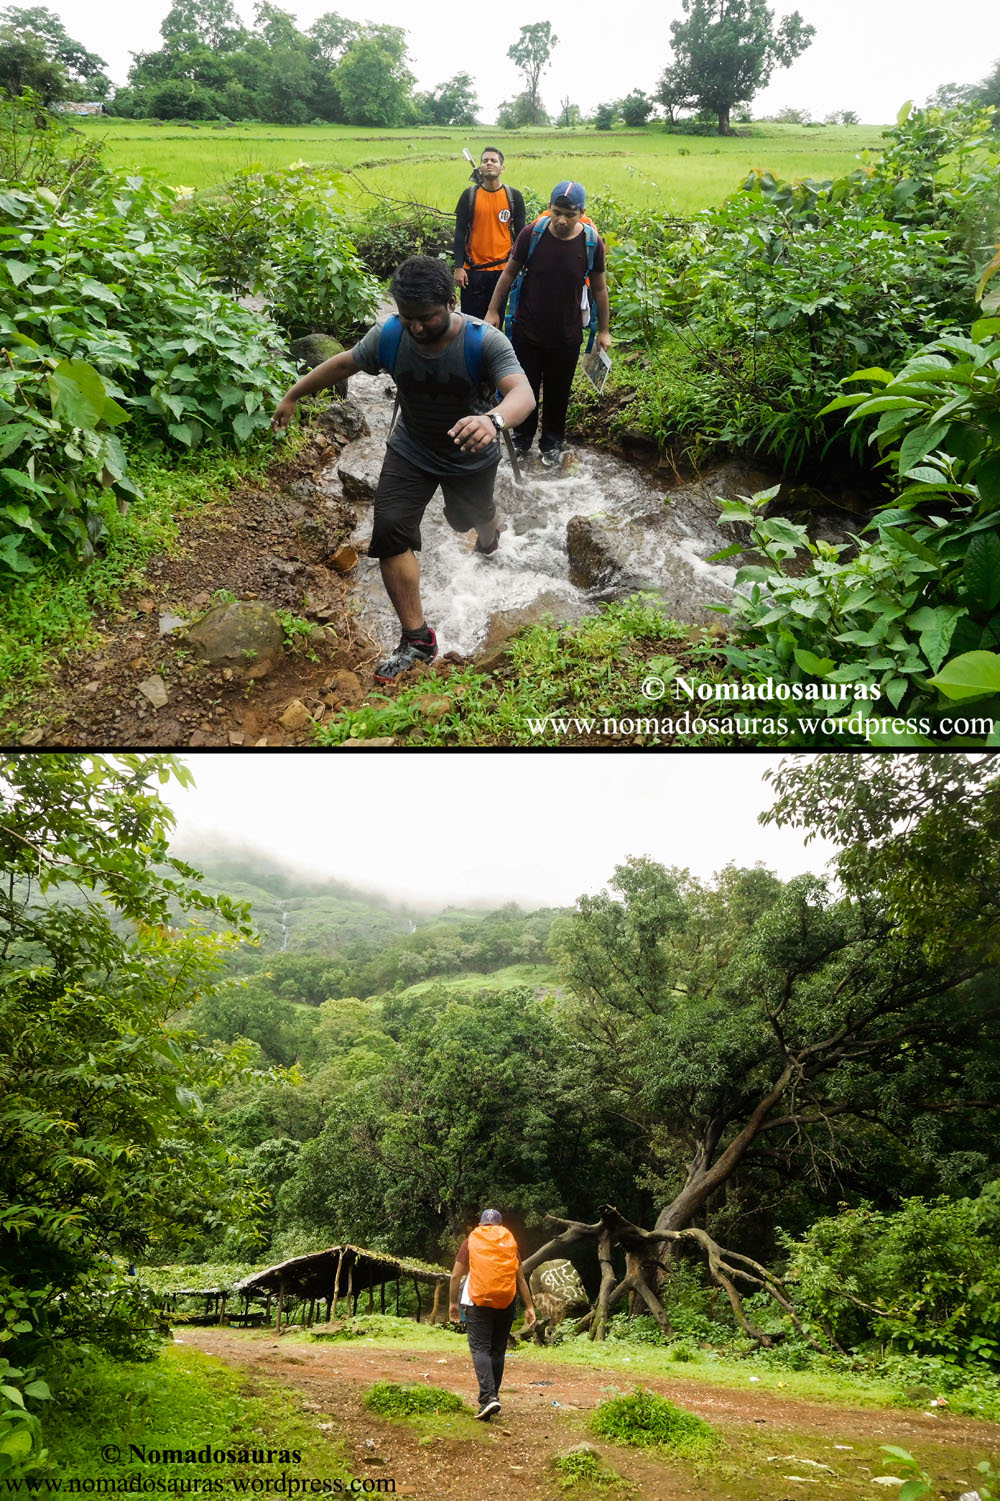
Barely 10 minutes had passed and we were back on our feet, crossing (Jumping, in my case as I intended to keep my shoes dry for as long as possible! An exercise in futility as you ‘ll read in a while) numerous small streams that cut through the trail. The sound of gushing water had been increasing steadily as we walked farther from the clearing and when the trail finally turned a little to the south, the source of the sound appeared- A gushing stream, nay almost a rivulet!

NOTE: A little tidbit about my footwear! I have been using Coaster’s (A small Delhi-based company which used to manufacture excellent VFM shoes but unfortunately closed down earlier this year) Rocky pair of shoes since my first trek and hence, this was my first trek with the Action trekking shoes.

Even though it provides excellent grip on all kinds of surfaces you ‘ll find on a typical Sahyadri trek, the major downside during a monsoon trek is the amount of time it takes to dry because of the thick inner cushion which holds water.
Back to the trek! The number of people who throng even this comparatively difficult route during weekends can be gauged from the fact that a villager was busy building a stall near the rivulet! The villager offered to guide us to the top of the Shidi Ghat but I politely declined. When Abhi is leading a trek, who needs anyone else! 😉 While the rest of the gang frolicked in the safer part of the rivulet, I struck up a conversation with the friendly guy. He told us that the region hadn’t got much of a rainfall in the last couple of days, which explained the reduced flow of the rivulet. He showed us the barren rocks, about two metres from where we stood, upto which the rivulet rises when fed by a few hours of heavy rainfall.
With the flow not threatening by any stretch of imagination, we decided to let the rope stay inside the backpack and instead crossed over by taking small, short steps. The shallow water crossing, though only 10 feet long, gave us an idea of the herculean task it must be to cross the swollen rivulet when the water rises to a height of 3 feet and width increases to a good 30 feet!
NOTE: Even when the flow does not seem fast enough, be cautious and carry a rope for safety. The riverbed is inclined in the flow’s direction, which increases the drag by a significant amount.
Flat slabs of rock on the other side separate the forest & the rivulet. Multiple trails originate from the rocks and enter the forest but the correct one is the broadest so not much to worry about. The drizzle had stopped by the time we entered the forest, which coupled with the dense canopy turned the atmosphere unbearably humid. So much for gushing about the perfect weather earlier in the day! ☹
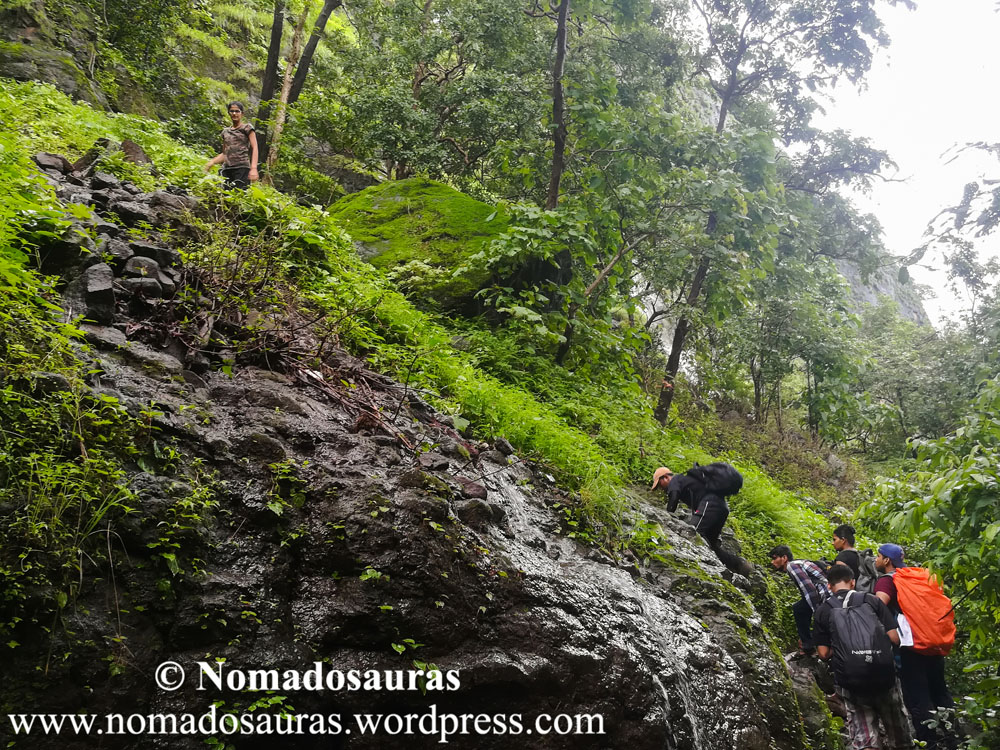
The initial part through the forest alternates between level ground & steep zig zag trails which lead you to a small clearing, in the middle of which stands a huge boulder surrounded by neatly arranged smaller stones.

A closer look at the boulder revealed the reason behind the unique arrangement- a small Shivling carved on top of it. With the mountain face (& the ladders) so close and no sign of another flat patch as far as we could see, Tejas decided to change into his shoes for a better grip over the steep climb.

NOTE: It’s a good idea to carry a pair of light sandals along with shoes, especially on treks with long patches of dry land and the streams appearing intermittently.

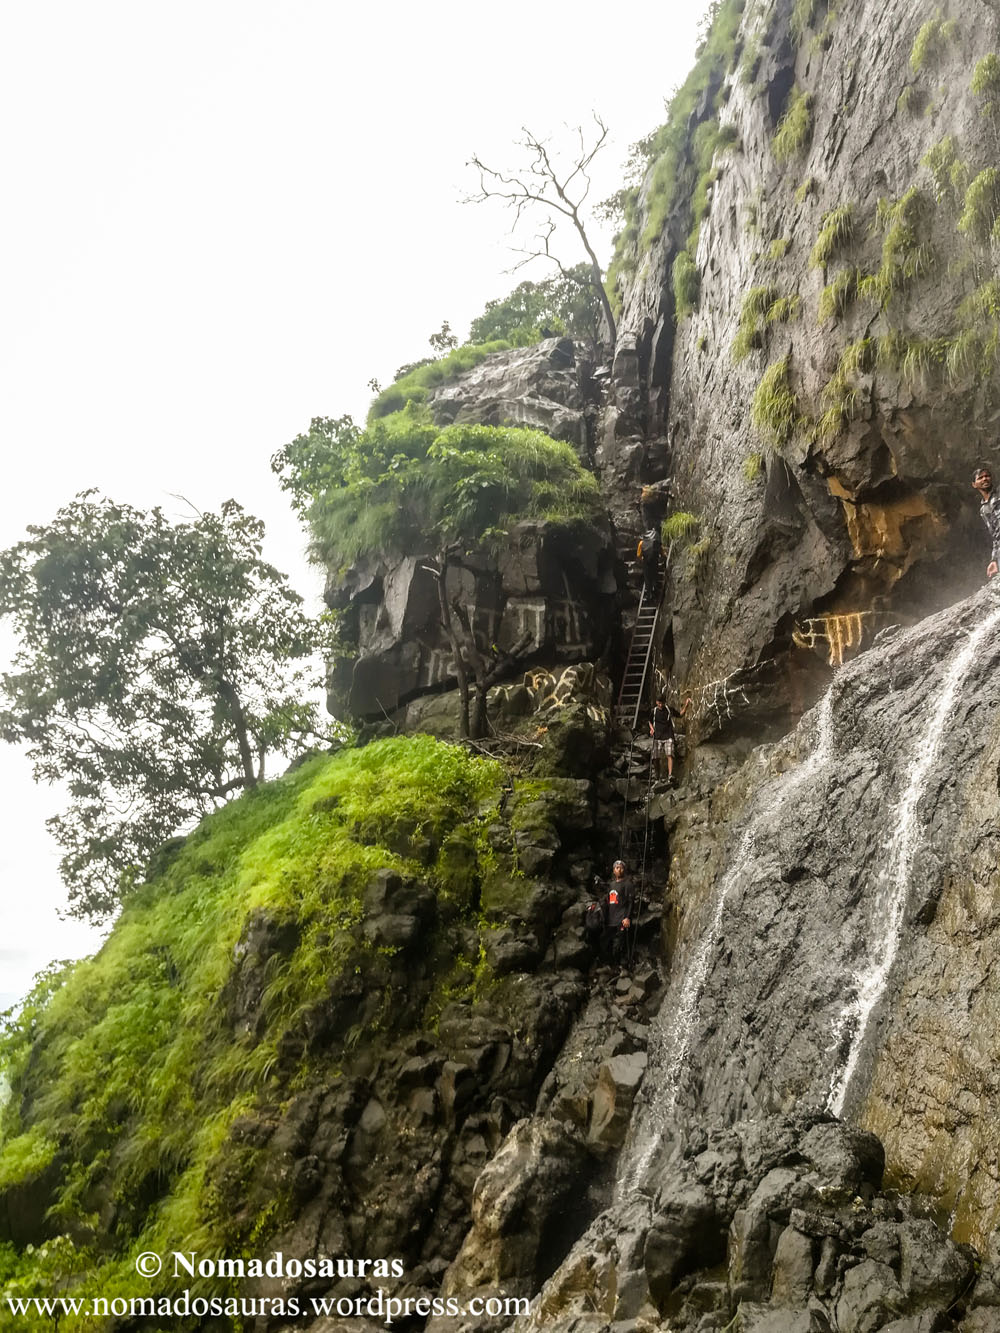
10 minutes after leaving the carved boulder, we got our first glimpse of the rusting first ladder.

With the normal circuitous route blocked by a fallen tree, we had to climb by an even steeper gully with only tree roots for holds.
The first ladder is actually is two ladders (the first very steep and the latter steep, visible in the earlier picture) connected by a few welded rungs to aid the stepover. The lower part rests on a concrete base, supported in the middle by an iron pole standing on another concrete base in the middle of the rock face. Some villagers had been resting at the base of the ladder but upon seeing us panting creatures, they kindly cut short their break and continued downwards to Khandas to let us rest there instead.
Sapped by the humid conditions, we decided it was better to get in some electrolyte water before starting the climb. Abhishek was going to lead this section as he was familiar with the route and the holds at tricky places. So he went up first, followed by Tejas, Omkar, Mansi, Manish, Darshana, Shardul & Me (We had decided this order after much thought and tried to maintain it during tricky portions). The ladder’s visual may not inspire much confidence but it’s surprisingly sturdy and as long as you do don’t go bonkers and climb 5-6 people at a time, it ‘ll hold up.
NOTE: While looking up info about the trek, I had come across a trekking group’s event circular with a picture of some 10-12 trekkers sitting on the ladder’s rungs. Please avoid such photo-ops. You are not only putting your own life at risk but also weakening the structure and putting other trekkers at risk for no fault of theirs.
The first ladder gives you an amazing view of the valley and is easy to climb except for the welded rungs stepover. The first rung of higher part of the ladder actually juts beyond the welded rungs, which means you have to use your upper body strength while doing the steover. If this complex manoeuvre is freaking you out, relax! You ‘ll do it intuitively once you reach the section, so chill.

The latter part of the ladder interestingly has the greatest example of the typical Indian Jugaad- halfway up the ladder, at an elevation of 1400 ft above MSL and 200 feet above the valley, Shardul noticed a huge Godrej door lock holding a broken rung in place with the ladder’s rod!
The ladder led us to an easy rock patch which stretches all the way to the base of the cave.
The second & third ladders have been propped up in the vertical gully on the left of the cave. One can enter the cave by taking a long stride from the right of the ledge between the two ladders.
Meanwhile a pair of trekkers- two middle aged men working in Tata Power, whom we had spotted in the valley below while climbing the ladder, caught up with us. This ‘ll give you an idea of how the group size typically affects the climbing speed. They had covered almost twice as much ground as us in the same amount of time and hence, I asked them to go ahead while we stepped into the cave.
The cave provides an excellent view of the Khandas village in the west and of Padargad in the South. A stream from the top of the plateau falls over the cave, forming a thin curtain of water across its entire face.

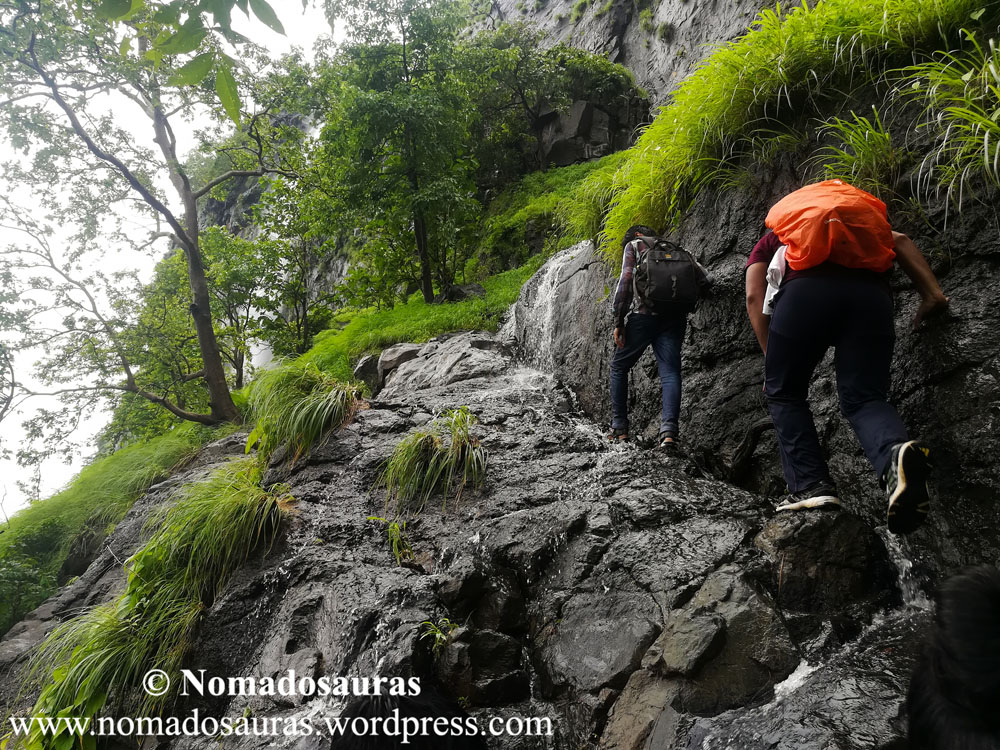
We took off again after spending some time in the water curtain, which provided some much needed respite from the humidity. The sturdier third ladder took us to the base of the scary looking rock patch seen in umpteen pictures of the Shidi Ghat.

The 60 degree inclined rock patch overlooks a 200 feet drop and shouldn’t be attempted by beginners without adequate safety measures (there’s a bolt at the top of the rock patch, used by adventure groups for tying a rope to help beginners climb it safely). While it has a couple of half holds to place your feet, it’s primarily meant to be climbed using the excellent finger holds carved in the rock face.

Another simple climb over mid-sized rocks after the patch brought us to the other highlight of the Shidi Ghat- the Traverse. While it does not have much of an exposure (less than 30 feet between the traverse and the rock bed below), the traverse is made tricky by a protruding rock, which needs to be ‘hugged’ while traversing to maintain balance, especially with heavy bags dragging you back.
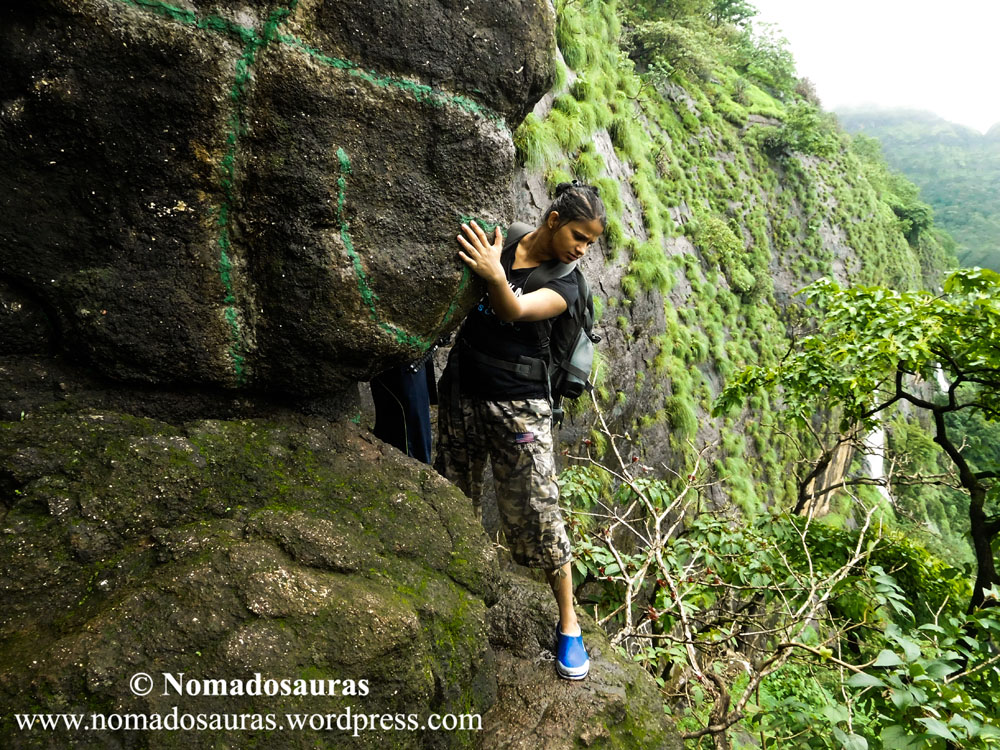
The traverse is followed by another easy climb through a crack between two rocks which takes one on top of the protruding rock. The next move can be a little tricky when it’s raining heavily- One needs to take a U-turn from the top of the protruding rock and at the same time, negotiate a vertical gap of about 30 inches between the first foothold and the top of the protruding rock. Okay, so you are tall and flexible enough to take a vertical step of over 30 inches. Easy for you? Nopes.
Factor in a sloper handhold and a drop of 20 feet onto the rocky bed you just climbed before the protruding rock and you ‘ll know why I am calling it tricky.

A trail from the top of this final rock patch leads you to the top of the waterfall and that’s it! We had done the Shidi Ghat! 😃
Here’s a High-Resolution picture of the entire tricky section:
Looking back, the Shidi Ghat had turned out to be an easy test. Even Abhi acknowledged that it was nowhere as difficult as he had found it the last time he had been here. But there were several reasons for that:
- There was only a light drizzle during the climb from first ladder to the top of the waterfall. Heavy rainfall would have made the rock patches much more slippery and strong winds would have increased the chances of rockfall, a grave danger.
- We have done several difficult monsoon climbs before, so our assessment might be relative to those climbs.
- All the warnings about the dangers of Shidi Ghat had mentally prepared us for a very tough climb; this actually made the actual climb seem easier, which btw, is a good thing cos then you can actually enjoy the experience as against freaking out when it happens vice versa.
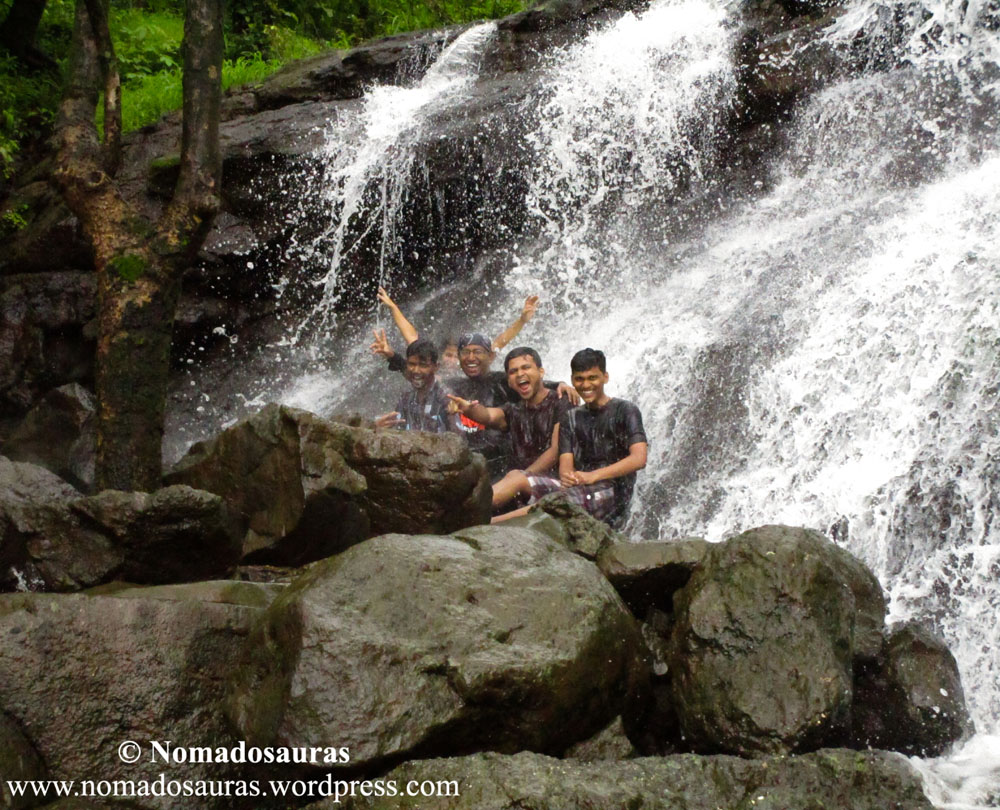
Since the waterfall wasn’t too voluminous, we spent some more time cooling down in it before continuing by the trail going north from it.

The trail led us to a deserted stall and in front of us was a structure as tall as the one we had just climbed- the upper plateau of Bhimashankar!

Another trail originated from the stall and went east, cutting through paddy fields before taking us to a couple of stalls at the foot of a huge fallen mango tree- Chahacha Aamba!
NOTE: Chahacha Aamba is a term by which locals refer to the point where the routes merge due to the stall serving tea to trekkers on the way to Bhimashankar. In Marathi, Chaha means Tea & Aamba is Mango/Mango tree.
Since it was a weekday, the stall was obviously deserted and the only people nearby were the Padarwadi folks (there’s also the Pawarbaba’s Ashram- it’s marked on Google Maps) on the left of stall. The kind villagers offered us tea but as we were way behind our schedule, we had to decline it with a heavy heart. I dropped a message to Anupama updating her about our location and quickly gobbled some sandwiches before starting the most exhausting phase of the trek- The Mungi Ghat!
To read Part II of Bhimashankar trek series, click here -> Part II
All rights reserved © 2016 – present Nomadosauras.
Content (including images) not for reproduction in any form, partial or otherwise.
Read complete disclaimer- Terms Of Use.
Cheers!
Keep Trekking
